在python3.7环境实现给图片添加图片水印以及文字水印。另附python读取excel单元格内容。
利用本程序修改后可以实现,给商品sku图片批量添加水印的功能。excel操作仅测试了读取单元格内容的代码。
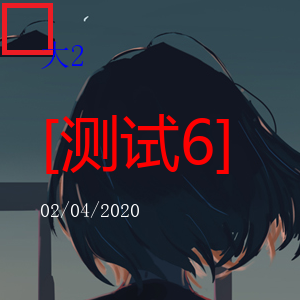
#from PIL import Imagefrom PIL import Image, ImageDraw, ImageFont##pip install pillow##import datetimeimport timedef pic_add(textin1,textin2,savename):#第一行文本,,第二行文本需要保存的图片名字#pip install pillow#创建底图target = Image.new('RGBA', (300, 300), (0, 0, 0, 0))#打开头像nike_image = Image.open("./image1.jpg")#nike_image = nike_image.resize((300, 300))#打开装饰,水印图片,这里用固定值了,有需要的可以设置为变量hnu_image = Image.open("./ll.jpg")# 分离透明通道r,g,b,a = hnu_image.split()# 将头像贴到底图nike_image.convert("RGBA")target.paste(nike_image, (0,0))#将装饰贴到底图hnu_image.convert("RGBA")target.paste(hnu_image,(0,0), mask=a)draw = ImageDraw.Draw(target)#显示图片#target.show()#rawsocket.sendto(imcp_packet,(dst_addr,80))#OSError: [WinError 10049] 在其上下文中,该请求的地址无效。#选择文字字体和大小setFont1 = ImageFont.truetype('C:/windows/Fonts/simsun.ttc', 30)draw.text((40,40),textin1,font=setFont1,fill='#0000ff',direction=None)setFont2 = ImageFont.truetype('C:/windows/Fonts/msyh.ttc', 60)draw.text((40,100),textin2,font=setFont2,fill='#FF0000',direction=None)setFont3 = ImageFont.truetype('C:/windows/Fonts/SIMYOU.TTF', 20)#draw.text((40,200),str(datetime.datetime.now()),font=setFont3,fill='#FFFFFF',direction=None)draw.text((40,200),str(time.strftime("%d/%m/%Y")),font=setFont3,fill='#FFFFFF',direction=None)#target.show()# 保存图片,只能保存为png格式!target.save(savename)############################python读取excel操作开始###########################import openpyxl#pip install openpyxl#pip install pymodel# 打开excel文件,获取工作簿对象wb = openpyxl.load_workbook('商品示例.xlsx')# 从工作薄中获取一个表单(sheet)对象#sheets = wb.sheetnames#print(sheets, type(sheets))# 创建一个表单 代码无效??#mySheet = wb.create_sheet('Sheet1')#print(wb.sheetnames)# 获取指定的表单#sheet3 = wb.get_sheet_by_name('商品信息')# DeprecationWarning: Call to deprecated function get_sheet_by_name(Use wb[sheetname]).#sheet4 = wb['商品信息']#for sheet in wb:# print(sheet.title)ws = wb.active # 当前活跃的表单#print(ws) #<Worksheet "商品信息">#print(ws['A1']) # 获取A列的第一个对象 #<Cell '商品信息'.A1>#print(ws['A1'].value) #商品信息xxx#c = ws['B1']#print('Row {}, Column {} is {}'.format(c.row, c.column, c.value)) # 打印这个单元格对象所在的行列的数值和内容#print('Cell {} is {}\n'.format(c.coordinate, c.value)) # 获取单元格对象的所在列的行数和值#print(ws.cell(row=1, column=2)) # 获取第一行第二列的单元格#print(ws.cell(row=1, column=2).value)#print('{}行 {}列'.format(ws.max_row, ws.max_column)) #行和列的总数max_excel_row = int(format(ws.max_row))+1#print(max_excel_row)i =1j = 0for i in range(1,max_excel_row):#print(i)name = str(ws.cell(i,2).value)guige_picname = str(ws.cell(i,11).value)gongying_name = str(ws.cell(i,1).value)if name != '' and guige_picname !='None':pic_name = guige_picname + '.png'print('正在写入第('+str(i)+'/'+str(max_excel_row-1)+')个商品:'+ name +' 的图片文件:'+ pic_name)write_text1 = gongying_namewrite_text2 = '[' + name +']'pic_add(write_text1,write_text2,pic_name)j = j+1print('写入有效商品图片个数:'+str(j))
本例中excel示例内容


发表评论